on
Redirecting DNS traffic using UniFi DNAT and Pi-Hole
It’s been a while since I last made a blog post, sorry. Lots of good things have happened in that time. I’ve since setup a company and, if you wish, you can hire my services. On with the show!
The What
The purpose of this blog is to show you how you can leverage the new DNAT feature introduced in the UniFi Network Application 8.3.32 to redirect some/all DNS traffic to a custom (local) endpoint. My own use-case for this is to redirect outbound DNS traffic from devices which have opted not to use my own Pi-Hole server (I’m looking at you, IoT devices) and instead to force them to use it silently.
This is a better solution than using a firewall to block all traffic destined for 8.8.8.8/1.1.1.1 etc, as it means that the device can continue to function whilst still subject to your own blocking criteria. It may also help prevent any non-compliance where you may be blocking specific DNS entries, such as for parental control or IoT lockdown.
The How
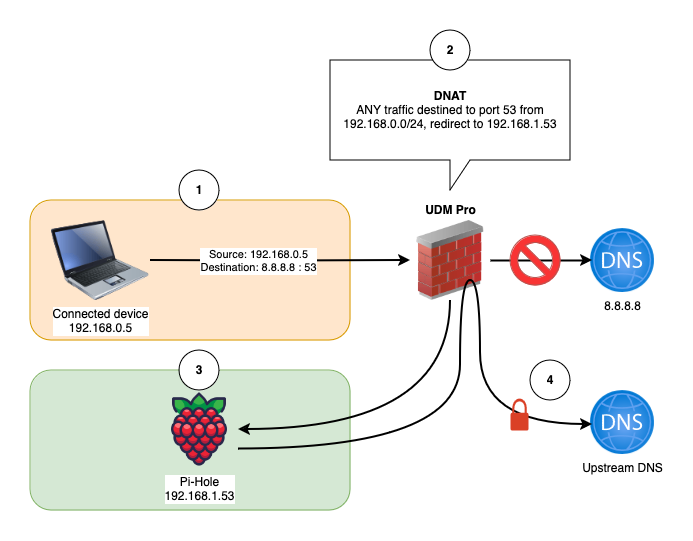
We’re going to leverage the magic of DNAT - Destination Network Address Translation. Simply put, this allows us to re-write the destination target of packets passing through our network. We can also use DNAT to re-write other fields at the Layer 4 level of the packet, such as port numbers. Ubiquiti released an enormous update to their Network Application which now allow custom SNAT/DNAT rules that enables this solution. The following assumes that you’re also using an up-to-date UniFi device which supports DNAT, or a custom network appliance with similar capabilities.

In the example above, we’re going to assume that we have a local DNS server running on IP 192.168.1.53 which we want to force all of the 192.168.0.0/24 network to use. Normally, clients would populate their DNS server settings from the local DHCP server, but some IoT devices may ignore these settings and use a 3rd party DNS service.
We’re also assuming that your DNS server and your traffic source are on different VLANs. It’s a bad idea to apply the following rule to your DNS server itself, as you’ll end up in a situation where the DNS server is having its outbound DNS traffic redirected to itself!
Start by making sure that, if you are using a Ubiquiti device, it is up to date. I’ll be using a UniFi Dream Machine Pro for this.
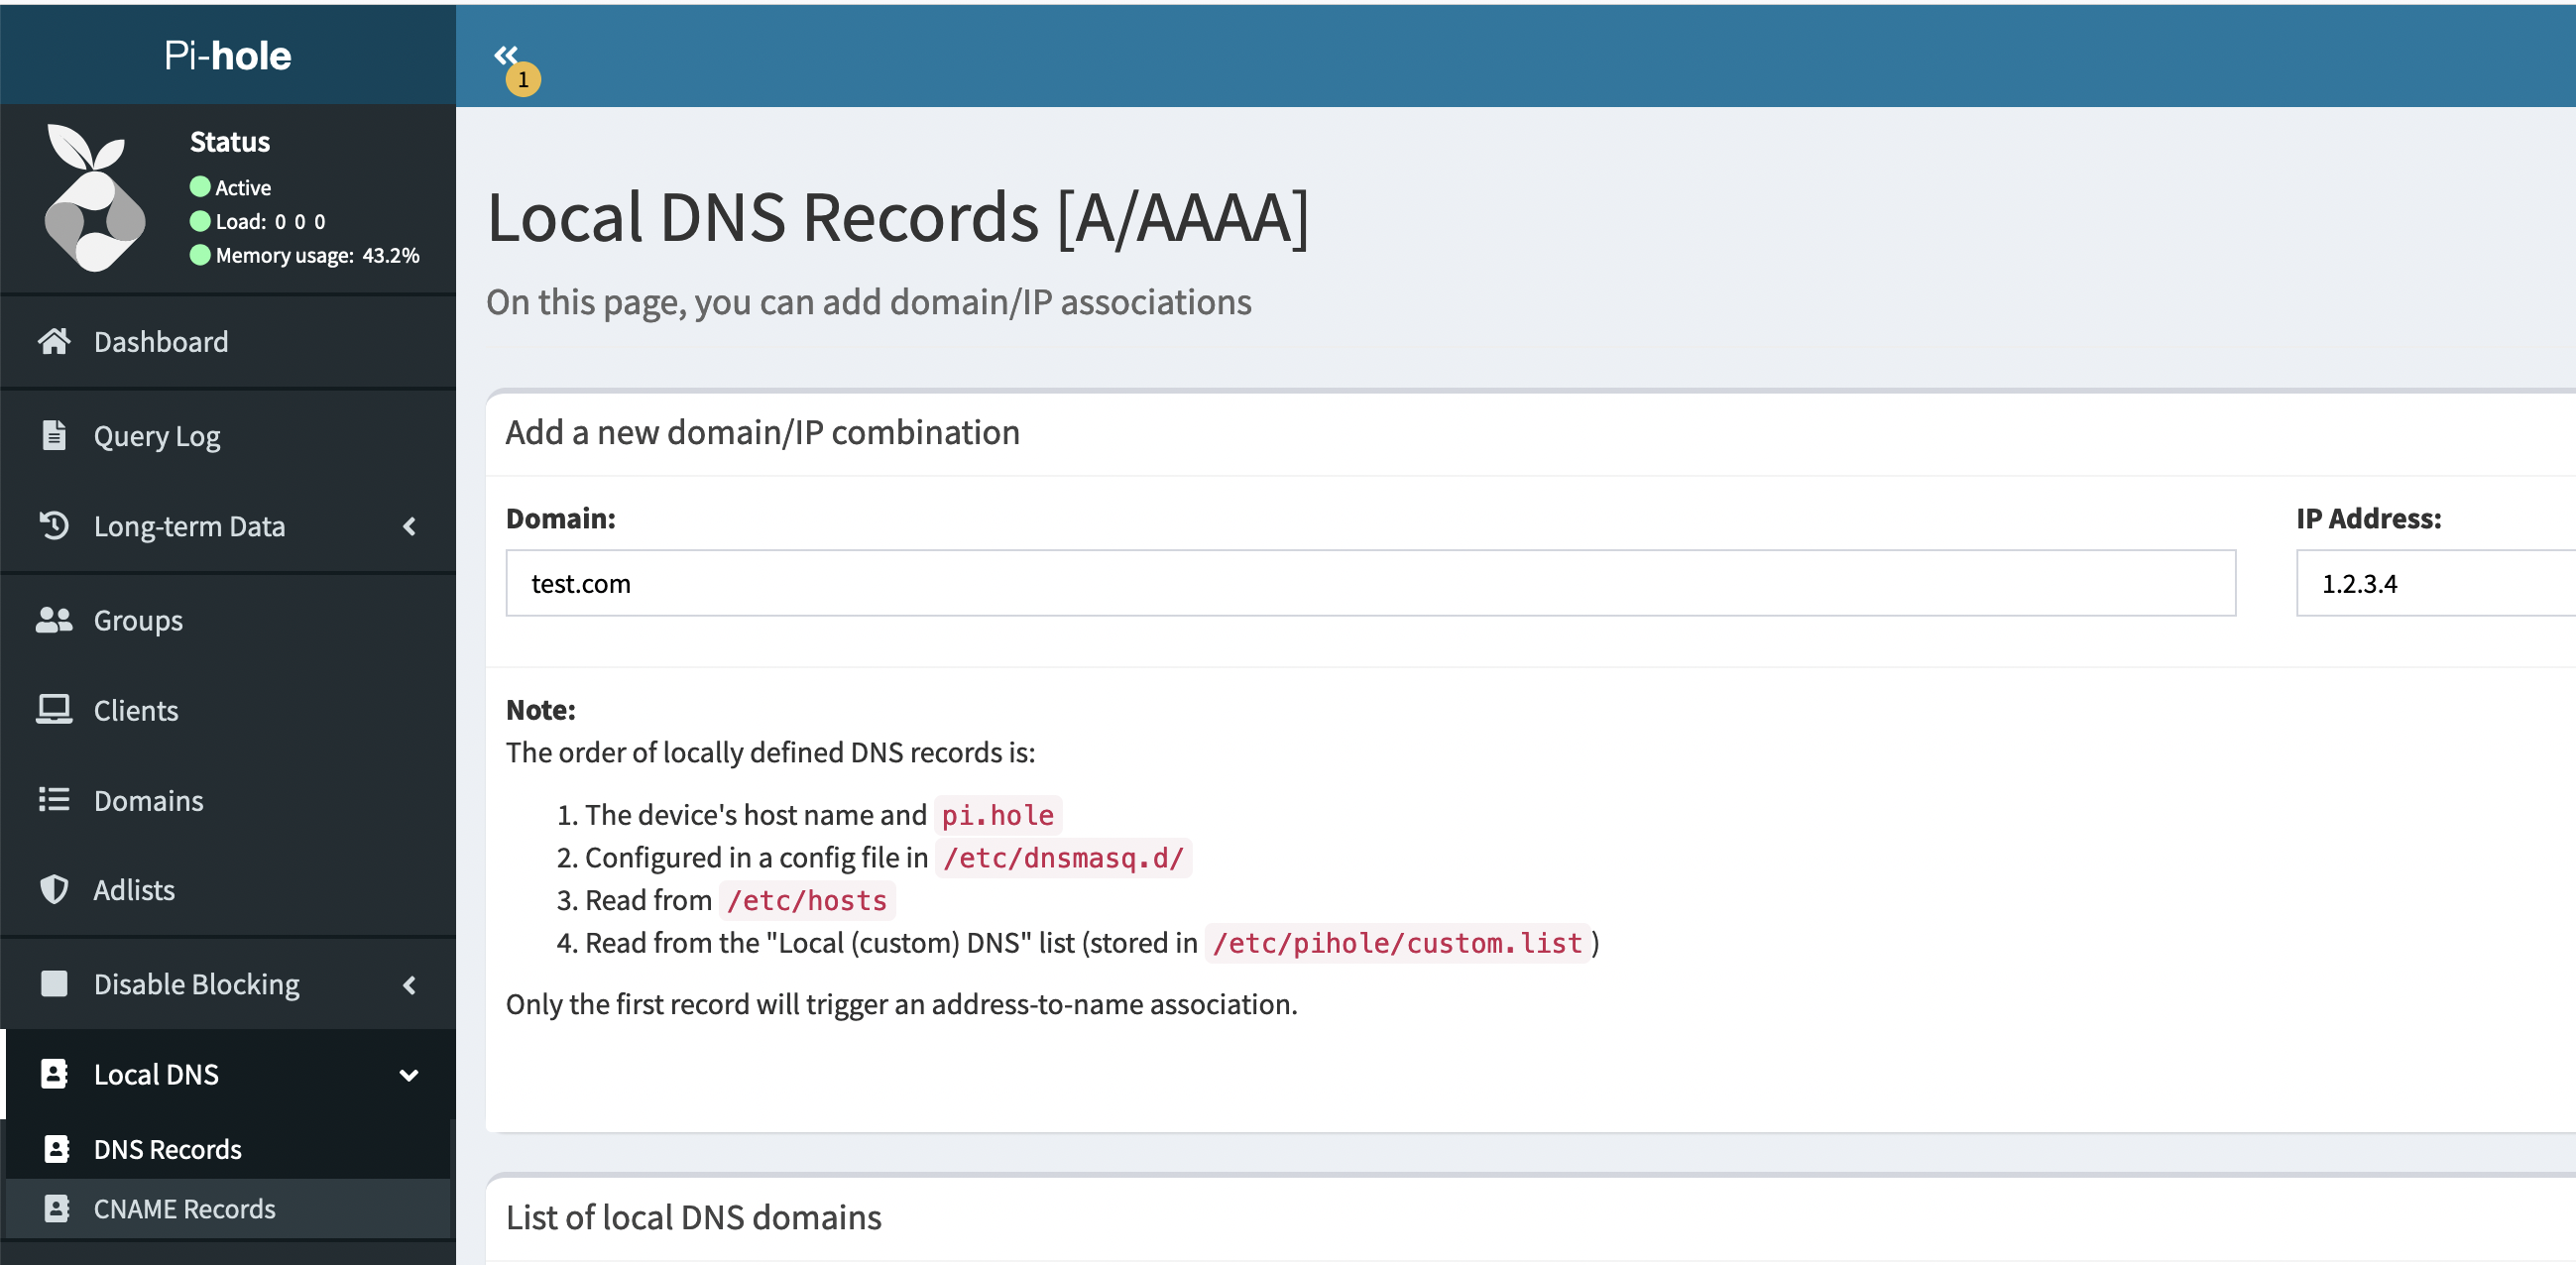
If you are using a Pi-Hole or custom DNS server, I recommend adding a local domain for testing such as the following. This will allow you to test and verify that DNS is being properly redirected.

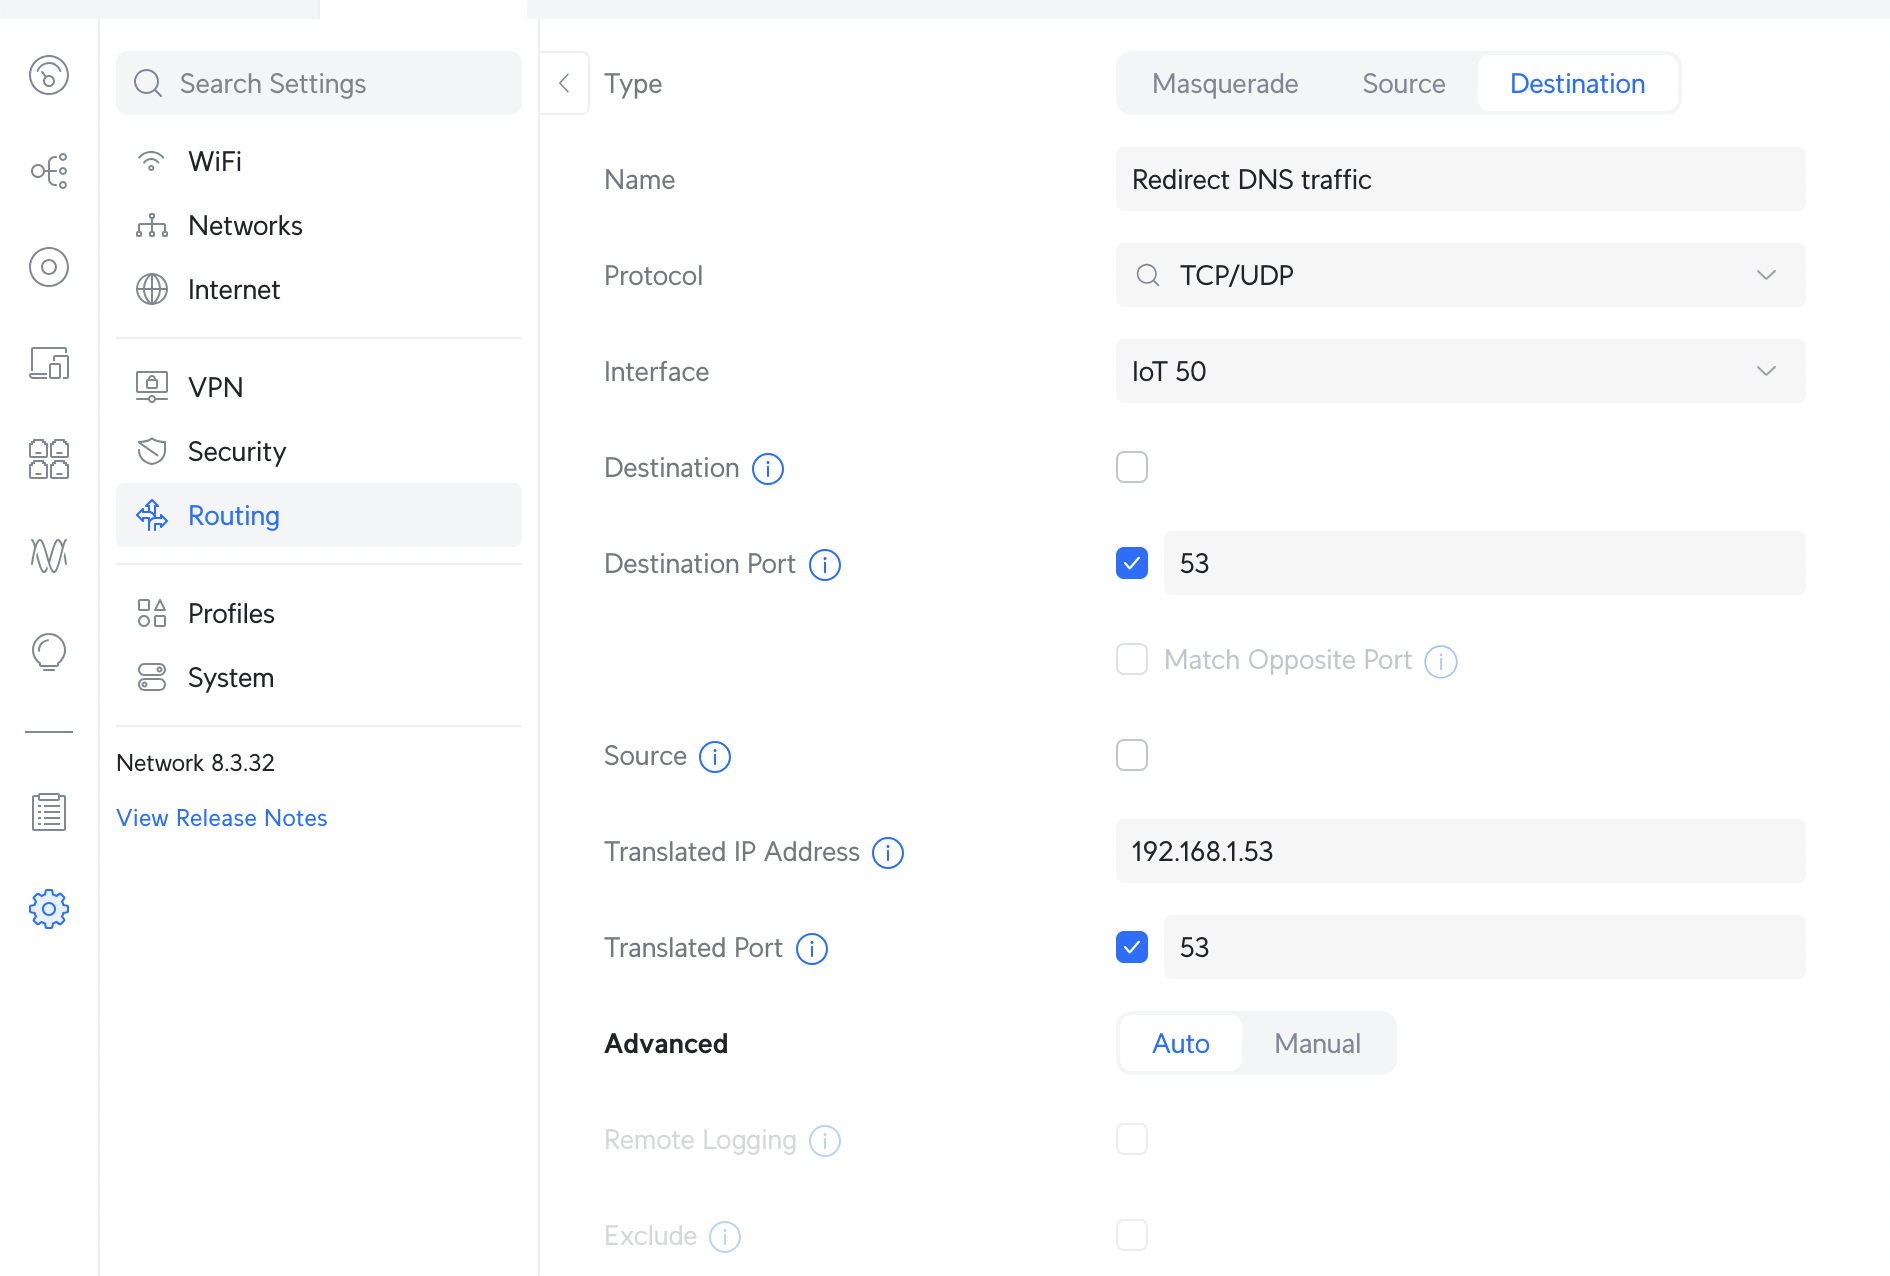
Firstly, navigate to Settings -> Routing -» NAT

Create a new entry as similar to as follows:
Type: Destination
Name: A custom name for your rule. Something short and sensible!
Protocol: TCP/UDP
Interface: Select whichever VLAN is used for your user/IoT/... network
Destination Port: 53
Translated IP Address: 192.168.1.53 (replace with your DNS server)
Translated Port: 53

This rule will apply to all DNS traffic on port 53. If you want to restrict it to only specific upstream DNS servers, such as Google’s 8.8.8.8 or Cloudflare’s 1.1.1.1, set the Destination field too.
Rinse and repeat this process for any other networks you wish to redirect DNS traffic from.
Make sure to not include the network which contains your DNS server itself.
Save and exit.
That’s it!
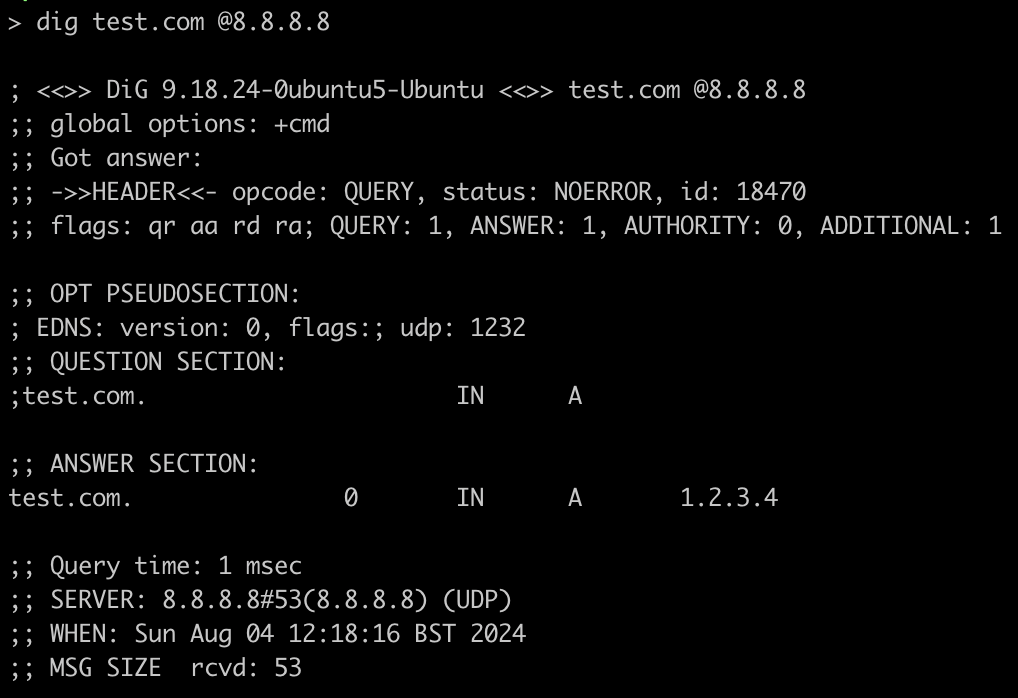
After a few moments, you should be able to test that this has worked as intended by attempting to send a DNS request to an external DNS service.
If you created a test record on your DNS server, you can simulate a request to Google using dig or nslookup and watch it resolve your test record transparently:

Update 30/11/2024
Frank from Denmark wrote to me with the following (summarised) query:
Would it work to redirect DNS traffic to 192.168.53.1 (a UDM-Pro interface on a VLAN with no devices) to ensure traffic is being routed? In this case, the UDM Pro could work as the DNS target on a dedicated VLAN, instead of a Pi-hole.
I didn’t know the answer to this, so I tried it out! Sure enough, if you create an empty VLAN and point the destination DNAT traffic to the UDM-Pro interface on this VLAN, the traffic is routed and will be redirected to the UDM-Pro. This will allow you to force network devices to use the native DNS services of the router rather than needing to host a dedicated Pi-Hole on its own VLAN.
N.B. Ubiquiti have a tendency to update their user interface frequently. The images above may no longer be accurate if you are reading this far in the future. Also if you’re reading this far in the future, hello!